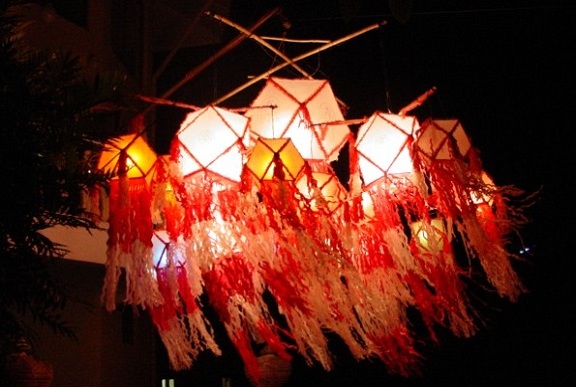
Vesak is a popular festival celebrated by Buddhists worldwide. In commemoration of the Birth, Enlightenment and Passing Away of Lord Buddha, Vesak lanterns are amongst one of the most important activities carried out during this season. Celebrate vesak in Sri Lanka this year with Blue Lanka Tours and be amazed at how beautiful the country look at this time of the year.
Although lanterns are readily available, there is a completely different excitement in making these yourself. Each year, there has been a change in the art of making lanterns. People like to display their creativity in these lanterns. In fact today’s generation construct and exhibit large lanterns that depict stories of Lord Buddha. If you are a beginner at making vesak lanterns, here is a step by step guide on making a simple ‘atapattama’ shaped lantern.
What you need:
- 24 sticks that are of the same length. The ideal material would be bamboo but if you cannot find bamboo, any sort of wooden strips would be fine.
- Twine (light weight string)
- A sheet of board (from an old cardboard box)
- Decorative materials for the lantern: colored tissue paper, transparent plastic sheets, wrapping paper, etc. Make your choice depending on how you want the finished lantern to look.
- Small candles placed in metal dishes (metal dishes prevent the lantern from burning)
- Patience! A lot of patience is required in making a lantern.
Instructions
- With the 24 sticks and the twine, make 6 squares and tie each square with diagonals. This means the string should be stretched both directions from opposite corners. Measure the diagonals and ensure your squares are perfect. You can add strength to the lantern framework by adding glue at each of the intersections.
- Now you have to tie the squares together. This may be difficult, so get help from a friend who can hold while you tie, or vice versa.
- Decide the face of your base. Cut out a cardboard piece to fit the base. Let the board sit on the sticks or glue it underneath the sticks. Glue will make the lantern more long lasting. This base is where your candle will rest so it has to be quite strong.
- Tie a string to two opposite corners on the top of your frame to allow for hanging of the lantern.
- Cover the framework to add strength to your lantern. This step requires careful judgment of how well your corners are tied. Cutouts in some places will make the lantern beautiful. Keep in mind that a lantern uses light as its source. Use your imagination and get creative with the decoration. Tip: cellophane will give a nice effect to your lantern.
When attaching decorative materials, think about the finished look of your lantern. Do all the cutting and painting before you paste it. If using candles, remember that the top should not be covered. Otherwise you may end up burning the lantern down. - Colorful crepe/tissue paper strips hanging from the lantern gives a finishing touch to the decoration. Colorful glitter would also add to the attractiveness. If your lantern is strong enough, hanging smaller lanterns from corners would look exceptional.
- Place your candle or light bulb on the base of your lantern.
- Hang your lantern where people can see it and light it up at night. For candle based lanterns, be careful about the surroundings since there is a possibility of the lantern catching fire.

